

Tips for Your Intercom Installation
Are you about to wire your intercom system? The first essential step is to draw a schema of the intercom to identify the directions of the necessary connections. Here are some keys to help you find your way around so that you can draw up a comprehensive and effective schema for your installation.
Intercom schema
To install your device, you must first draw up a schema to help you find your way around and install your device efficiently. To do this, you have several choices:
By yourself: making a schema for an intercom is a delicate operation when you do not know much about electricity. Poorly installed, an intercom will not be able to fulfill its function properly.
It is more reassuring to call a professional. Installers are usually electricians or specialists in security systems.
By a professional: an electrical schema requires knowledge in electricity that a professional has. He knows how to adapt to the configuration of your home and create a custom schema so that your installation works best.
Intercom schematics: points to know
Intercom models
Your schema requires, above all, a model of intercom adapted to your expectations in terms of use and functionality:
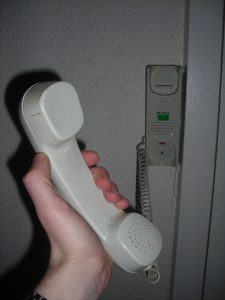
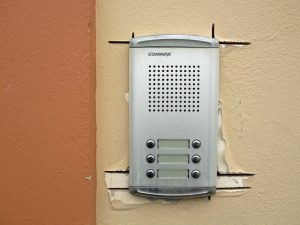
– Intercom: the intercom, also called audio intercom, is a device that allows you to communicate with the outside world through a speaker. It can have different options ranging from the handset to the digicode through a recording device.
– Videophone: For maximum security, you can opt for a colour or black and white videophone. It allows you to see the person ringing your doorbell and verify their identity.
– Doorbell and chime: a standard piece of equipment, this small box alerts you to the presence of a visitor by ringing. Be careful; the bell does not allow you to communicate or see the person outside. It is better to couple the doorbell to a door phone or a videophone.
– Digicode: the digicode opens an automatic gate or a door once a secret code is entered.
Intercom schema: the different types
The schema of your intercom can be of various types depending on the model you have chosen. Here is an overview of the main schemas:
Type of schema |
Indications |
|
7-wires schema |
– Place the outer plate and the inner box on either side of your schema.
– For this schema, draw in parallel five wires connecting the two elements inside and outside. These five wires correspond to different assembly elements: the first is a cable typical to both boxes. Then there is a cable for the microphone, the speaker, the electric strike and the buzzer. – The last two wires with a positive and a negative filament are connected to the electric lock on the one hand and the transformer on the other hand. |
|
2-wires schema |
– This schema is composed of two wires (red and blue). You must draw them on your schema to know the + and – poles and the direction of the current.
– Draw the door station and the interior handset in parallel. Place the electric lock and the transformer under the door station. – Connect the door strike to the indoor unit. Then draw a cable from the door station to the handset and another from the handset to the 12V transformer. |
|
2-wires + 2″ schema |
– As with the other schematics, draw the outer board and the inner box separately.
– The first connection should be from the board to the handset. – From the handset, draw a cable parallel to the first connection to the electric lock and the 12 V transformer. |
Intercom schematics and equipment to be purchased
Once you have drawn your schema, you will need various items to ensure a functional installation. To find your equipment at a reasonable price, here is a list of the main possible outlets:
– Do-it-yourself stores;
– electronics stores;
– sales sites;
– specialized catalogues;
– supermarkets.
Intercom installation: the guarantee of a professional
Going through a professional to have your intercom system installed has many advantages:
– Choice of models: by habit and thanks to their in-depth knowledge of the market, professionals can guide the customer towards the model that corresponds precisely to his needs.
– Personalized advice: before drawing up an estimate, a specialist always comes to your home to study the site’s configuration and discuss the feasibility of the project with the customer.
– Work: For the electrical installation and the trenches, the professional has all the necessary know-how for clean work done in a minimum of time. The electrician has all the necessary tools: no need to go back and buy the installation material in the middle of the job.
– Guarantee: If the system malfunctions, you can turn to the professional who will come to repair and put an end to the malfunction by identifying the fault certainly faster than a Sunday handyman.
Installation of an intercom in a building
In buildings, the electrician is often constrained by the installations already in place:
– The work is limited to installing the interior box that you must connect to the available wires.
– Attention, in a collective residence, the installation of an intercom is subject to the co-ownership agreement.
Installation of an intercom in a villa
For a house, the installation time depends on the structures already in place and can go from only a few hours to several days:
If there is already a casing between the door or gate and the house’s interior, it is enough to pass the power supply through it.
– If there is no casing, you must make a trench: a longer and more expensive solution.
– If multiple indoor units are to be installed, various breakthroughs may be required.
– If the indoor box controls several openings, the installation time will be proportional to the number of inlets connected.
Good to know: Wireless systems do not require such work.
Price of installing an intercom system
The prices charged by professionals vary greatly depending on the specifics of the project and the region.
Including labour, warranty and material, installing an intercom system varies from $500 to $2,000. Despite this additional cost, it is still preferable to call a professional. It is also the price of comfort and tranquillity.


[…] Intercom System | Tips for Your Intercom Schematics and Installation; […]
[…] Intercom System | Tips for Your Intercom Schematics and Installation; […]
[…] Intercom System | Tips for Your Intercom Schematics and Installation; […]
[…] Intercom System | Tips for Your Intercom Schematics and Installation; […]